In Horizon Zero Dawn hunting grounds are where you can participate in hunter trials. You can try to finish three trials in each one. The challenges are not easy, and the time it takes you to complete them will determine your ranking. Horizon Zero Dawn Hunting Grounds has five challenges that are essential for the game’s strongest weaponry.
The prizes for obtaining blazing sun medals are substantial, and the trials themselves are intriguing. We will show you how to finish all of Horizon Zero Dawn’s hunting grounds challenges in this post.
Table of Contents
What are Horizon Zero Dawn Hunting Grounds?
There are six hunting grounds that are known to exist. Keepers from Meridian’s Carja Hunters Lodge look after five. The sixth is unrelated to the Hunters Lodge and is located in Banuk territory known as The Cut. Hunters are put to the test at each of the Lodge hunting sites, with trials involving tools (blast wires, etc. ), elemental ammunition (fire arrows, etc. ), stamina, stealth, and leverage (using one machine’s weaponry against others).
There are three trials in each hunting ground. The groundskeeper evaluates a hunter’s performance in a trial. For each solar rating, each trial has a set time limit; the shorter the time limit, the higher the rank. Let’s dive into the details of Horizon Zero Dawn’s Hunting Grounds. Following are the horizon zero dawn hunting grounds.
- Nora Hunting Grounds
- Valley meet Hunting Grounds
- Great run Hunting Grounds
- Spur flints Hunting Grounds
- Sun Furrows Hunting Grounds
- Snow chants Hunting Grounds
Nora Horizon Zero Dawn Hunting Ground
Start by speaking with Cren on the road leading out of the Mother’s Embrace region, which is to the east of the Main Embrace Gate.
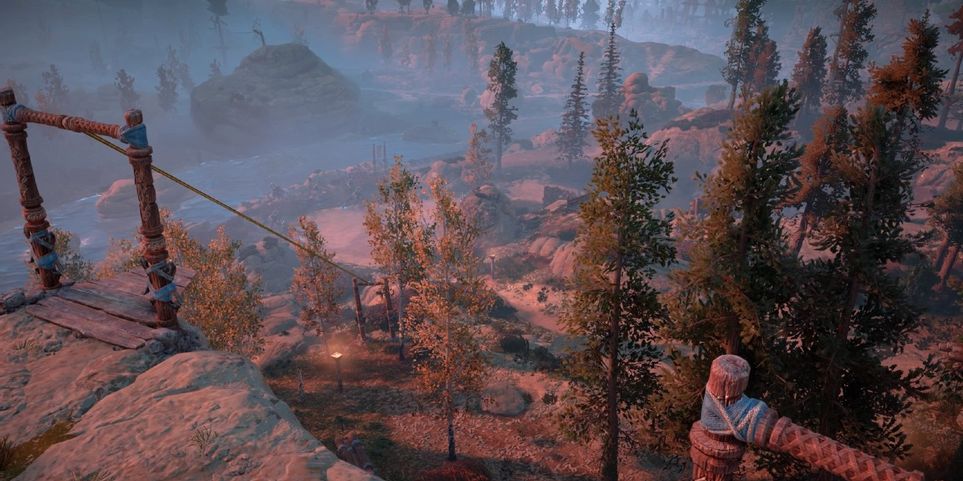
The Horizon Zero Dawn Hunting Ground will appear on the map after you chat with Cren. This is shown on the map with a blue bow and is located across the river to the east. To find a campfire, a trader, and the Groundskeeper, work your way around the area’s base, then scramble up the tall, rocky structure in the center designated by the goal marker. To begin the trials, contact him.
There are three trails available, each with a Gold, Silver, or Bronze rating upon completion. You will need the following equipment to complete each of them:
- Blast Sling
- Carja Tripcaster

Parts Alone Trial
- Gold: 1:00 – Blazing Sun
- Silver: 2:00 – Full sun
- Bronze: 20:00 – Half sun
You must strike Blaze canisters off Grazers, not blow them up for this trial, so keep your blazing arrows away and swap to regular hunter arrows. It is very easy to shoot arrows after arrows into the cluster of canisters on their backs if you stand facing their direction of travel and slightly behind them.
Launch a bomb behind the herd to make them fear. Tear blast arrows from the Carja Sharp shot Bow, or perhaps the Tear blaster itself, make quick work of this task later in the game.
Logpile Trial
- Gold: 2:00 – Blazing sun
- Silver: 5:00 – Full Sun
- Bronze: 20:00 – Half Sun
This trial demands us to kill three machines using logpile traps strewn over the hunting grounds (Grazers or Watchers). Shooting and killing a Grazer or throwing an explosive to one side of them to startle the herd and cause it to flee is the simplest way to accomplish this. Shoot one of the traps as it passes, releasing the logs and killing any machines running beneath it. Both of these solutions are viable, but they are both difficult to implement. This trial is mainly just about learning how the Grazers react to your activities and getting them to funnel into one of the logpile trap regions before you exploit their location.
You may easily beat this by laying electrical lines directly in the path of the logs with the trip caster to “freeze” the Grazers beneath the logpile before scaring the herd. They will be pretty hard to miss with the logs once they are locked there, and you can set the trap whenever you want.
Blastwire Trial
- Gold: 3:00 – Blazing Sun
- Silver: 6:00 – Half sun
- Bronze: 20:00 – Half sun
You will need to buy a Carja Tripcaster to participate in this trial. You will be able to make explosive rope traps that will explode when a machine passes across them once you have obtained one. In this attempt, this will instantly kill Grazers. Position some traps in each of these locations (if you have the resources, you can seed 6 traps along each route in just over a minute, giving you another two to spook them), then either shoot dead a Grazer or hurl an explosive to one side of them to frighten the herd and have them wander into the traps.
Valleymeet Horizon Zero Dawn Hunting Ground
The Valleymeet grounds are near the short pass that joins the east and west parts of the map, on the outskirts of Nora territory. Characters with a level of 18 or higher are eligible to use them. The following are the three tests that await you:
Fire Flight Trial
- Gold: 0:40 – Blazing Sun
- Silver: 1:20 – Full Sun
- Bronze: 20:00 – Half Sun
With fire arrows, attack strider canisters. You must have a bow capable of shooting Fire Arrows in order to complete this trial. Within the time restriction, we will have to employ said arrows to shoot the Blaze canisters situated on the backs of four separate Striders.
Shock Trial
- Gold: 1:00 – Blazing Sun
- Silver: 2:00 – Full Sun
- Bronze: 20:00 – Half Sun
Shock bellow backs and uses canisters on their undersides to incapacitate them. This is ideal for a tripcaster with shock wires. Use arrows with enough rip to pierce the armor surrounding the canisters. To finish the challenge, you will need to disconnect all three canisters from the Bellowback. It is best to attempt this challenge on a Bellow back away from the Striders to avoid being distracted.
Freeze Trial
- Gold: 1:30 – Blazing Sun
- Silver: 2:30 – Full Sun
- Bronze: 20:00 – Half Sun
While frozen, destroy machines. Concentrate on the striders, use frost grenades from a sling, and remember that the effect is only activated when the meter is full (and the target is covered in ice).
Spurflints Horizon Zero Dawn Hunting Ground
The grounds at Spurflints are designed for characters with a level of 18. They can be found near the eastern edge of the woodland in the southwestern part of the map. To begin your trials, speak with the Groundskeeper. Here are the trials you will face:
Watch Out Trial
- Gold: 2:00 – Blazing Sun
- Silver: 3:00 – Full Sun
- Bronze: 20:00 – Half Sun
To finish it, we must kill four Watchers with a silent strike, either by creeping up behind them or by initiating them with the tall grass. The presence of Shell-Walkers and Stalkers, which you must avoid while pursuing the Watchers, makes it more challenging.
Stalker Kill Trial
- Gold: 2:00 – Blazing Sun Reward
- Silver: 3:30 – Full Sun Reward
- Bronze: 20:00 – Half Sun Reward
To accomplish this trial, locate and kill two Stalkers in the time provided. The best approach to finding Stalkers is to keep an eye out for the red vicinity mines they leave on the ground, as is customary. When you pass through a handful of these, the Stalker will appear to investigate. We can go after it now.
Sleight of Crate Trial
- Gold: 0:50 – Blazing Sun
- Silver: 1:30 – Full Sun
- Bronze: 20:00 – Half Sun
In the time allotted, we must locate and loot four Shell-Walker containers. Make sure your inventory is not full before starting this trial; else, you will not be able to loot the crates.
GreatRun Horizon Zero Dawn Hunting Ground
Great run, a level 20 hunting ground, is this one. They are near the pass that connects the east and west, towards the edge of the desert. This arena is in close proximity to Day tower. Speed and aggro management are the main obstacles here, but freeze resistance can aid. There are a variety of obstacles can be found there, including:
Parts Wrangling Trial
- Gold: 1:30 – Blazing Sun
- Silver: 2:30 – Full Sun
- Bronze: 20:00 – Half Sun
This horizon zero dawn hunting grounds trial demands you to blast a Trampler 3-4 times with a Ropecaster until it falls over owing to the ropes. Take advantage of the chance to go in and smash the luminous component near its stomach while it is down. This will be required for two Tramplers.
Pace Trial
- Gold: 1:30 – Blazing Sun
- Silver: 2:00 – Full Sun
- Bronze: 20:00 – Half Sun
In order to get to the three mesas with Watcher corpses above them, you must first run to them (the other places are a little tricky because of the Tramplers). Climb to the top of each tower and loot the body of the Watcher. To save time, jump to the ground below (using a potion) and continue to the next mesa. If you spot a Glinthawk attacking a corpse as you approach a mesa, shoot at it and harm it so it either flies away or drops the corpse nearby for you to approach and plunder.
Tie Down trial
- Gold: 2:00 – Blazing Sun
- Silver: 4:00 – Full Sun
- Bronze: 20:00 – Half Sun
Attack a Glinthawk to bring it into a range of our Ropecaster, then fire it 2-3 times to make the ropes drag it to the ground. Move in and press R1 when pushed to perform a critical strike while it is still on the ground.
Sun Furrows Horizon Zero Dawn Hunting Ground
Sun Furrows, a level 30 hunting area, is the last horizon zero dawn Hunting Ground. It is in the northwest quadrant of the map, north of Meridian and south of Cauldron Zeta, in the desert north of Meridian. Make no mistake, they are the most difficult hunting challenges you will face.
However, given how far you have progressed in the game, you should not have too many problems with them. You must, however, be able to overpower Ravagers, thus finishing Cauldron Rho first. You must do this in order to pass the trials.
Ravager vs. Machines Trial
- Gold: 1:10 – Blazing Sun
- Silver: 2:00 – Full Sun
- Bronze: 20:00 – Half Sun
Use tear blast arrows to shoot down two machines from a Ravager gun. One of the Tearblast arrows can be used to bring down a Ravager’s mounted rifle, simply pick grab the Ravager Cannon. Fire the Watchers with the remaining Ravager Cannon ammo until it dies, and the trial will be completed.
Thunderjaw vs. Ravager Trial
- Gold: 2:00 – Blazing Sun
- Silver: 2:30 – Full Sun
- Bronze : 20:00 – Half Sun
If you have finished the Cauldron ZETA for the ZETA overrides, this trial is actually quite simple, as running up and overriding the Thunderjaw will generally kill the Ravagers within the time limit for the gold medal (Blazing Sun). If you have no ZETA then to get the Thunderjaw’s Disc Launcher quicker, use a tearblast arrow.
Ravager Control Trial
- Gold: 2:40 – Blazing Sun
- Silver: 4:00 – Full Sun
- Bronze: 20:00 – Half Sun
Get a Thunderjaw Disc Launcher by using a tearblast arrow and killing two Ravagers with it.
Reward
Depending on rank, the hunter can get up to three specially improved Lodge hunting weapons if he or she completes all fifteen challenges over the five hunting areas. After presenting the suns to Aidaba, the Lodge’s weapons keeper, these are granted out at the Hunters Lodge.
- Lodge Ropecaster – 15 Half Suns or higher
- 15 Full Suns or higher
- 15 Blazing Suns: Lodge War Bow
Bottom Line
Horizon Zero Dawn has five Hunting Grounds challenges that are essential for unlocking the game’s strongest weaponry. The Horizon Zero Dawn Hunting Grounds trials are simple. While some are simple to accomplish with a few tough elements, others require a great deal of talent.
While figuring out how to solve these challenges is a lot of fun and will teach you a lot about Horizon Zero Dawn Hunting Grounds, we have covered all 15 challenges in this guide, along with the tactics needed to complete them, for the sake of efficiency.
Also check:


![How-To-Mod-Fallout-4-[PC-PS4-Xbox-One]](https://www.legendspit.com/wp-content/uploads/2023/03/How-To-Mod-Fallout-4-PC-PS4-Xbox-One-1-400x300.jpg)